Eufy Doorbell Installation (6 Easy Steps)
Are you looking for information on Eufy Doorbell installation? You are in the right place. The Eufy Doorbell is a smart video doorbell that stores camera footage on a base station. Therefore, you do not need a cloud subscription. It can be difficult to set up the doorbell and its base station. In this article, we’ll tell you the Eufy Doorbell installation process.
With Eufy Video Doorbell, you can monitor and secure your home round-the-clock. In real-time, you can talk to people as they stand on your doorstep! You can pre-record messages or speak with them in real time. Eufy doorbell installation can seem confusing at first, especially if you’re new to it.
For Eufy doorbell installation, you will need to remove your existing doorbell and install the new Eufy doorbell in place of the old one. Once the Eufy doorbell installation is complete, you need to set up your device with your EufySecurity account.
In this step-by-step guide, you will learn how to install your Eufy doorbell correctly and get the best security from the product.
How The Eufy Doorbell System Works
Before Eufy Doorbell installation, you need to know How The Eufy Doorbell System Works. The Eufy video doorbell system includes 2 parts. The first is the video doorbell at your door. The second is the HomeBase in your house. The Eufy video doorbell detects motion on your porch and allows you to answer it from anywhere at any time. Video clips are stored on the built-in storage of the HomeBase. The doorbell will alert everyone in the house when someone rings it.
Read This: How To Install Blink Doorbell (10 Easy Steps)
What’s in the Eufy Doorbell Box:
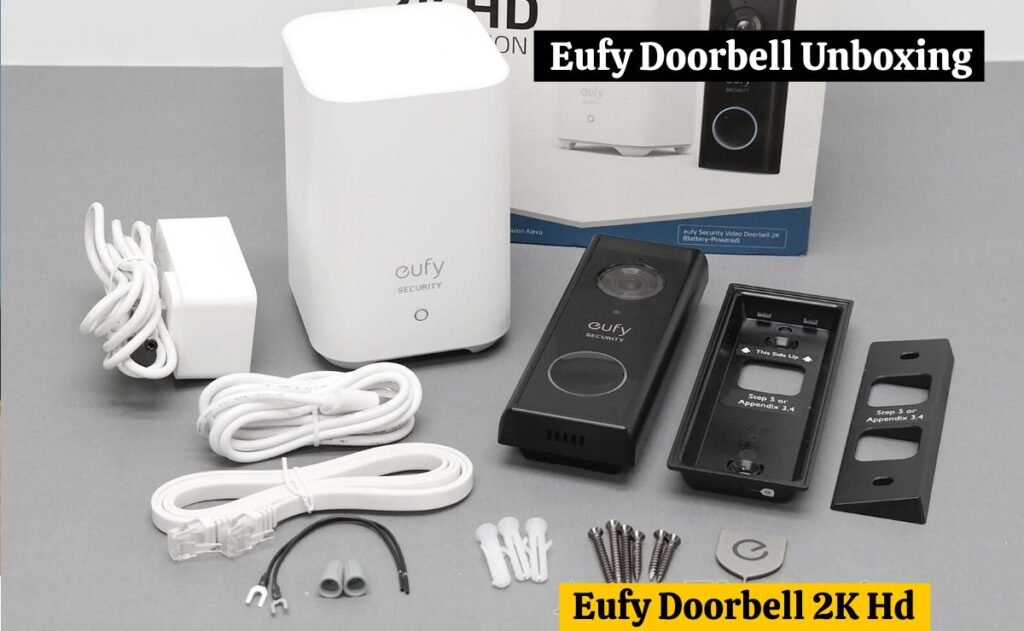
The first thing you need to do before Eufy Doorbell installation is check the Eufy box. In the box, here’s the following:
- A Eufy Video Doorbell (T8200)
- Doorbell chime
- Screw hole positioning card
- Mounting bracket
- 15° Mounting widget
- Screw packs
- Extension wire/ wire nuts
- Wire for existing chime
- Doorbell detaching tool
- Quick start guide
Read This: SimpliSafe Doorbell Installation ( 6 Easy Steps)
What’s Required for Eufy Doorbell Installation
- Phillips Screwdriver
- Power drill with 15/64″ (6mm) Drill Bit
How To Install Eufy Doorbell ( Step-by-Step)
Eufy’s new Dual Camera Doorbell comes with local storage and two mounting brackets. It can work with your existing doorbell setup or on its own with batteries. We tried setting up this new two-in-one video doorbell with just batteries on the front porch. The whole process only took a few minutes and was easy to finish. Plus, with the HomeBase 2 local storage unit, you won’t have cloud storage fees. Follow the simple steps below for Eufy Doorbell installation.
Read This: Ring Doorbell Installation (10 Easy Steps)
Step 1: Connecting The HomeBase:
- Turn on the HomeBase 2 and connect it to the home router using the Ethernet cable provided.
- The HomeBase 2 is ready for setup when the LED indicator turns blue (this may take up to a minute).
Step 2: Download the App and Set up the System:
- Download the Eufy app from the App Store (iOS devices) or Google Play (Android devices).
- Sign up for a Eufy account, then follow the on-screen instructions to complete the setup for Eufy doorbell installation.
Step 3: Determining The Power Option:
Before Eufy Doorbell installation, you need to determine the power option for your doorbell.
1: For Battery-Powered Eufy Doorbell installation:
Follow these steps for Battery-Powered Eufy Doorbell installation:
- Using the built-in battery is a good solution if you do not have existing doorbell wiring at your home’s front door. You are free to determine your doorbell position, and mounting is easy and quick.
- If the doorbell battery level is low, you should charge it and reinsert it.
- Please proceed to STEP if you choose this option.
- The next step is to choose a location for mounting.
| Note: Battery life varies depending on usage. In most cases, a doorbell records up to 10 events per day, and each recording lasts about 20 seconds. In this scenario, the doorbell battery can last up to 6 months. |
Read This: How To Install Nest Doorbell Battery & Wired (9 Easy Steps)
2: For wire-powered Eufy Doorbell installation:
Follow these steps for wire-powered Eufy Doorbell installation.
- If you have a working doorbell wiring at your front door, it will be powered by the wires constantly. After the Eufy Doorbell installation, you won’t have to detach and charge it.
- Now, you need to remove the wiring from your existing doorbell before a new Eufy Doorbell installation.
- Due to the doorbell’s connection to the wires, mounting positions are limited.
- Make sure the two wires are carefully removed when you remove the existing doorbell. If necessary, straighten the ends of the wire.
Tips For Wired Setup:
In the case of a wired Eufy Doorbell installation, it’s important to turn off the power at the fuse box before mounting the doorbell. You can check this by pressing the doorbell on your current home. Remove the cables from the old doorbell once the power is turned off. The wiring needs to stick out so you can reconnect it to your Eufy doorbell later. The doorbell operates on 8 to 24V. Depending on the type of home, a transformer will be needed to power the doorbell.
Read This: Blink Doorbell Not Detecting Motion (Causes & 12 Easy Fixes)
Step 4: Find a Mounting Spot:
You can check the live view on the app while taking the video doorbell to your front door. You need to find a location that allows you to get the desired view. Here are a few factors to consider:
1. Determine if the existing holes and anchors in the wall or door frame can be reused.
2. Make sure the doorbell won’t show up in the field of view if it is placed close to a side wall. Otherwise, IR light will be reflected, causing blurry night vision.
3. The recommended mounting height is 48″ / 1.2 m from the ground if you are drilling the mounting holes for the first time for Eufy doorbell installation.
4. You can use the 15° mounting wedge as a supplementary mounting bracket if you wish to see more on a particular side of the screen.
| Use the Screw Hole Positioning Card to mark the location of the screw holes during Eufy doorbell installation. |
Read This: Blink Doorbell Blinking Red ( Causes and 6 Easy Fixes)
Step 5: Mounting The Bracket:
Now, it is time to drill holes for the Eufy doorbell installation using a hole positioning card and a drill.
Mount the Doorbell on a Wooden Surface:
Pre-drilling pilot holes are not necessary if you’re mounting the doorbell on wood. Attach the doorbell Mounting Bracket to the wall with the provided screws. The Screw Hole Positioning Card indicates where the screw holes should be positioned.
| The following materials are required: A screwdriver, a Mounting Bracket, 15° Mounting Wedge, and Screw Packs. |
Read This: How To Reset Nest Doorbell (3 Easy Ways)
Mount the Doorbell on Hard Materials:
1. Drill 2 holes through the Screw Hole Positioning Card with a 15/64″ (6mm) drill bit if you are mounting the doorbell on a hard surface, such as brick, concrete, or stucco.
2. Secure the Mounting Bracket on the wall by inserting the anchors and securing it with the long screws provided.
| You will need a power drill, a 15/64″ (6 mm) drill bit, a mounting bracket, a 15° mounting wedge, and screw packs. |
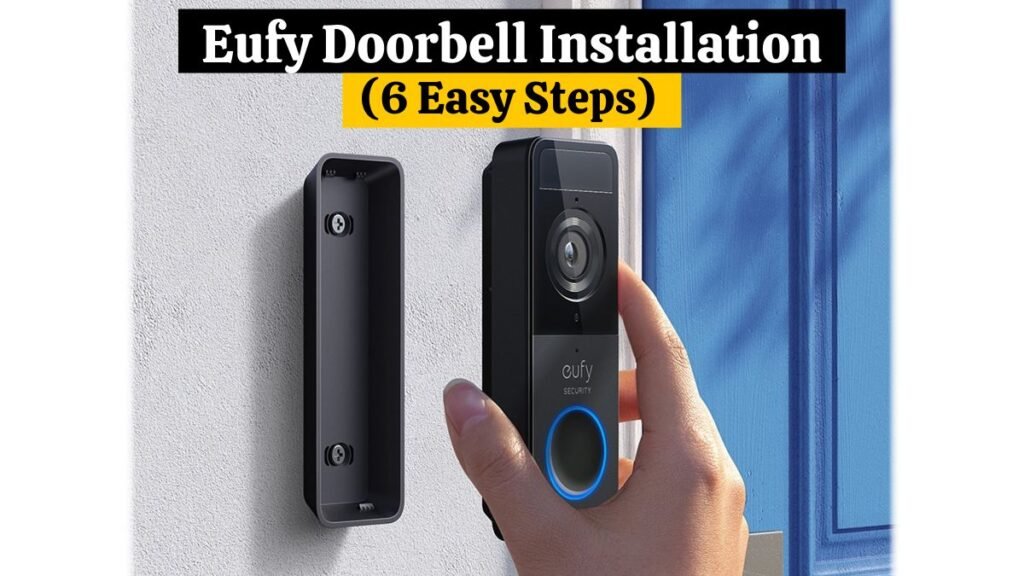
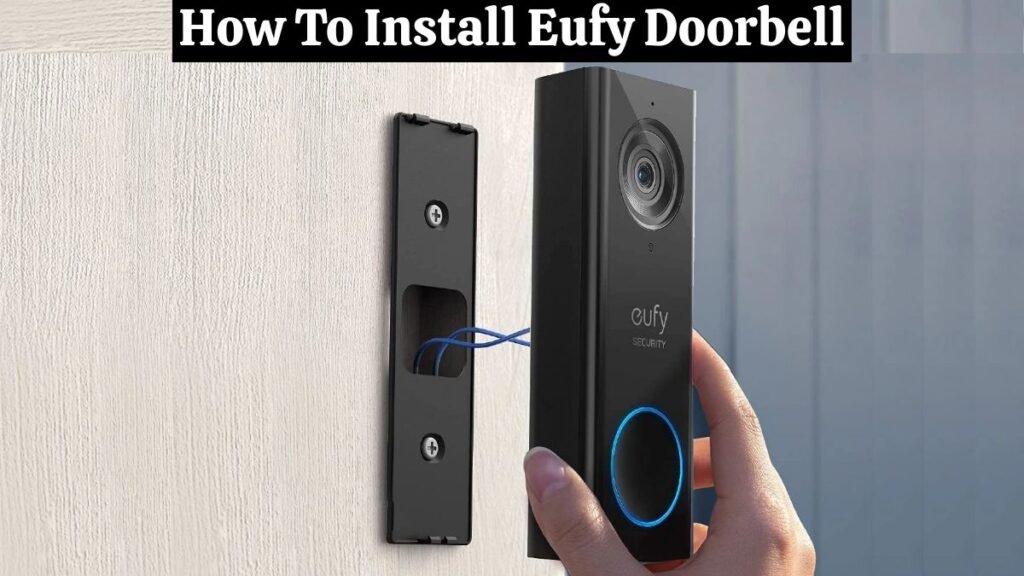
Step 6: Mount The Eufy Doorbell:
Align your Eufy doorbell on top and then snap it to the bottom. Press the doorbell down until it clicks into place.
Read This: How To Reset Ring Doorbell – Easy Steps For All Models
Eufy Doorbell Setup in the App:
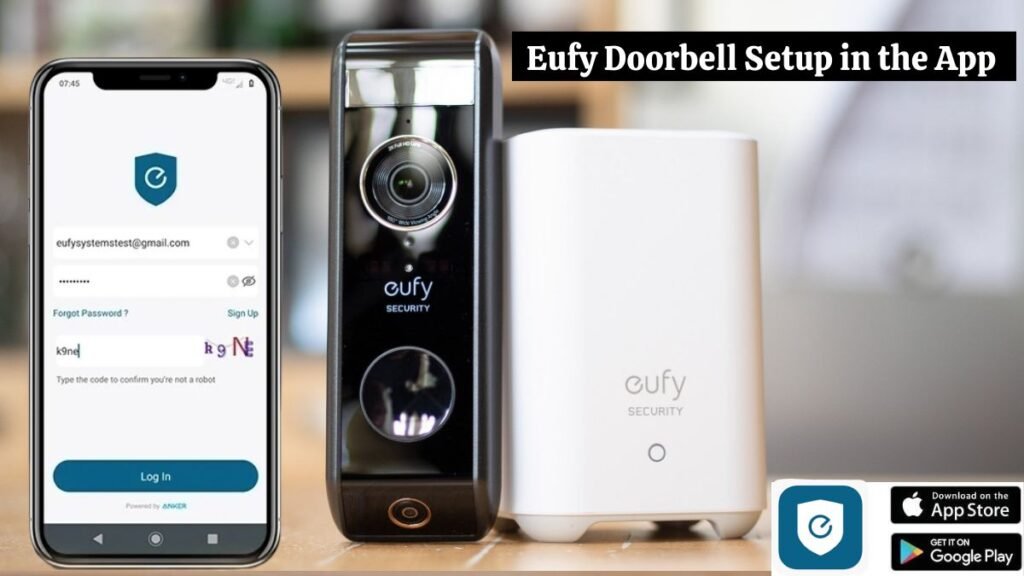
After Eufy doorbell installation, you need to set up your doorbell in the app. It’s easy to set up your doorbell in the app! You can set up your doorbell in no time by following these simple steps.
- Download the Eufy Security App.
- Log in to your existing Eufy account or register for an account.
- Click on “Add Device” and choose which device you own.
- Tap on “Okay” and then “Allow” to let Eufy access your smartphone’s camera.
- Scan the included QR code using your phone or enter the code manually.
- Select your country or region, such as the United States, and tap “Next.”
- Follow the on-screen instructions for Eufy doorbell installation.
Read This: How to Remove Nest Doorbell (3 Easy Steps)
Test Your Doorbell Voltage:
- The Eufy app will test your voltage to ensure the correct voltage (16-24 volts).
- Click on “Start” to test your voltage.
- Hold the doorbell button down for 5 seconds until you hear a chime. When you hear the chime, tap on “I hear the ringtone” in the app.
- There is an option to allow the app to see your location, which is optional.
- Next, you will see a message to turn on Bluetooth. Once that is turned on, click on “I have turned on Bluetooth.”
- The app should connect to the doorbell if the Eufy doorbell installation was done correctly. It will let you know that your doorbell is ready to use. If you get a different message, contact Customer Service for assistance.
Connect Eufy Doorbell to Wi-Fi:
Once your doorbell is set up in your app. Now, the next step is for the Eufy doorbell installation to connect it to WiFi:
- Select your WiFi network and enter your password.
- Press “Connect” to continue.
- Plug in the included chime and wait for a blue light to appear. When the light turns on, tap “Chime lights up.”
- Hold down the “Sync” button on the chime for 2 seconds. You should hear a chime and see the light flash. You can pair the chime with the doorbell once you hear this.
- Tap “Connect” in the Eufy app.
- Press the Eufy doorbell button to ensure that the chime is paired with the doorbell correctly.
- Tap on “Done,” and your doorbell is set up and ready to use.
After performing all these steps, your Eufy doorbell installation is completed, and you are ready to use it.
Conclusion:
Eufy Doorbell installation is a wise decision for those who want to upgrade their house’s security system. We have covered the entire process of Eufy Doorbell installation, linking it to the application and connecting it to WiFi.
The Eufy app allows you to configure your doorbell’s settings. You can do this by pressing the three dots on the right of your installed doorbell. Next, tap the gearwheel. The next menu is ‘General’, and the ‘Mount’ option is crucial. The display of your doorbell can be flipped 180 degrees, so you can see your visitors as if you were standing at the door yourself. You can share access to your doorbell with your family if you go back to your doorbell settings. After Eufy doorbell installation, you will be ready to receive your visitors.
FAQs:
- Can Eufy function without HomeBase?
Eufy SoloCam is a stand-alone device that operates without Eufy HomeBase.
- Can I use Eufy without Internet access?
Yes. Since Eufy Outdoor Cam is hardwired and stores video recordings on a microSD card, it will continue recording even if the power goes out. A 2.4GHz WiFi network is required to view the live view and recorded videos on the EufySecurity app.
- Why is my Eufy doorbell red?
When the light on your Eufy Doorbell turns red, it indicates a low voltage supply. If the doorbell is successfully reset, it will display a breathing red colour.
- Why is my Eufy Doorbell not connecting?
You should check your internet router to see if your Eufy Doorbell isn’t connecting. You need to ensure that your WiFi is providing an optimum frequency for the doorbell since it works on the 2.4 GHz frequency.
- How do I know the Eufy doorbell is fully charged?
A blue indicator light appears when it is charging, and it turns off when it is fully charged. Using the Eufy app or Homekit, you can also check the status of your battery.