

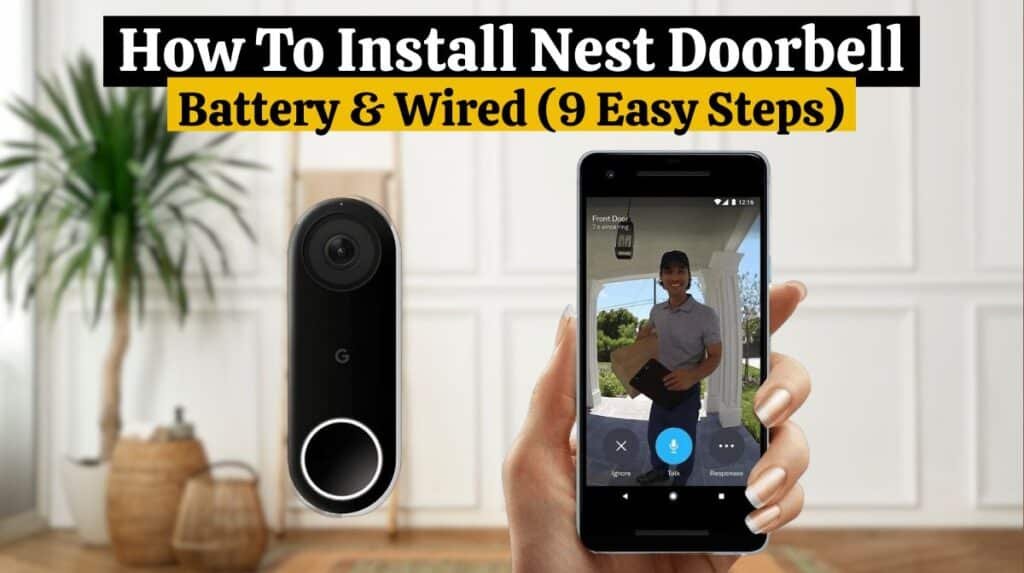
We were seriously impressed with Google’s latest Nest Doorbell version, a battery-powered video doorbell cam with advanced AI detection features that fit perfectly into the Nest ecosystem of smart devices. It’s also designed for do-it-yourself (DIY) installation. This article will show you how to install Nest doorbell battery and wired.
The Nest Doorbell installation for battery and wired version is easy. This article shows how to install Nest doorbell battery and wired. Let’s take a look at the Nest Doorbell installation.
How To Install Nest Doorbell Battery/ Wired:
Nest Hello is a smart doorbell with a built-in security camera quickly becoming a staple in the smart home world. However, buyers beware—there will be steps to how to install Nest doorbell battery and wired. Don’t worry; the Nest doorbell installation process is very easy for you by following these steps.
You can easily install your Nest battery and wired Doorbell. The Nest Doorbell installation process is different for the Nest Battery and wired Doorbell. For Nest Doorbell installation, follow these simple steps:
Read our guide if you are looking for information on How to Remove Nest Doorbell (3 Easy Steps)
Step 1: Choose a location:
It’s important to pick the right location for the Nest Doorbell installation. Place yourself by the door so you can see the porch area and reach the Doorbell easily. Normally, the Doorbell is mounted on the door’s trim, but this may damage the trim. It may also be possible to install it on nearby siding, but some siding is made of tough composite materials that do not drill quickly.
You should place the Doorbell about 4 to 5 feet up. This location is designed for video doorbell cameras. To remove the Doorbell for charging, you’ll also need a 2.25-inch space above it. When you are ready, mark the spot.
Read this guide if you purchased a new Ring Doorbell or replaced another doorbell with a Ring Doorbell and are looking for information on How to install a Ring Doorbell.
Step 2: Prepare Your Tools:
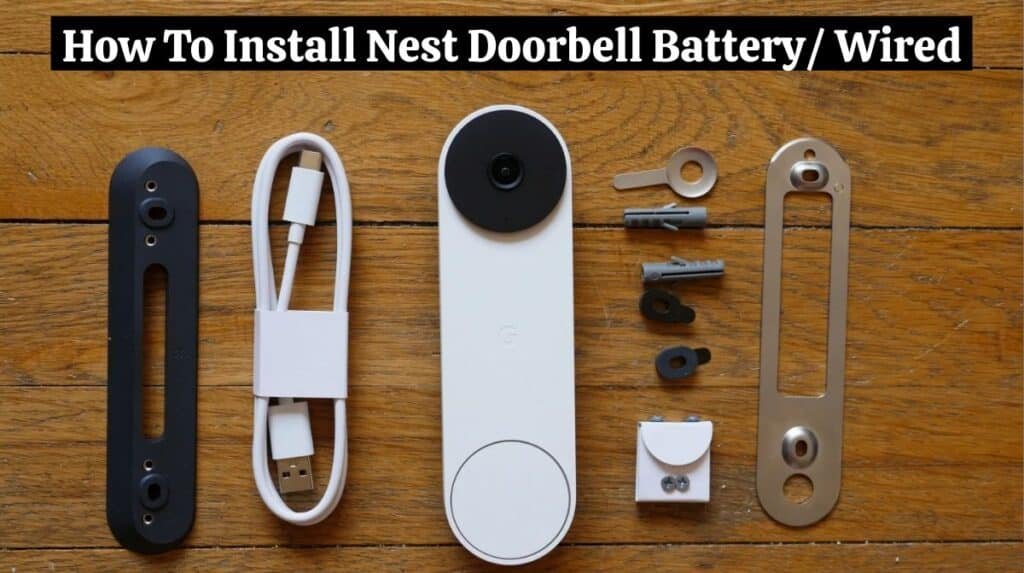
If you are going to prepare for the Nest Doorbell installation, you may need these specific tools:
- A pencil.
- A hammer.
- Phillips head screwdriver.
- Drill with a 2mm (3/32-inch) bit.
- 6mm (1/4-inch) additional drill bit.
Read our guide if you are looking for information on How to install a SimpliSafe Doorbell.
Step 3: Create a Nest Account:

For Nest Doorbell installation, download the Nest App from the Play Store or Apple Store if you are a new Nest App user. Follow the on-screen instructions to create a Nest account. You can sign in to your Nest account if you own one already.
| Note: If you have a Nest battery doorbell, firstly, you need to charge the doorbell battery. |
Read this guide if you are looking for information on How To Install Blink Doorbell (10 Easy Steps)
Scan The QR Code:
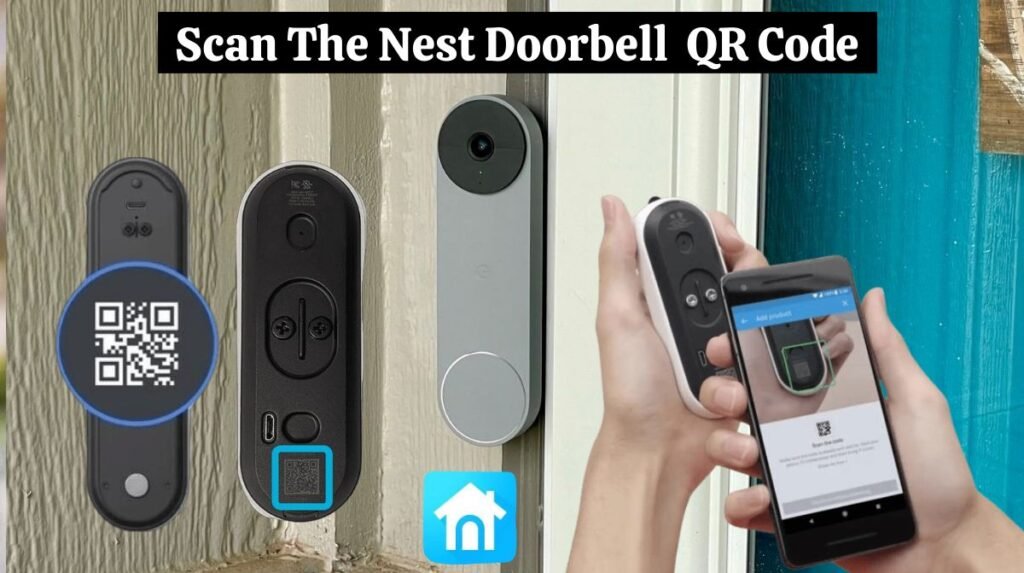
- Tap on the Add New + button on the home screen.
- Tap on the settings option on the left side of the navigation panel of your Nest app if you already own a Nest product.
- Now, you will be prompted to scan the QR code found on the back of the camera.
- Once the QR Code is scanned, Nest Hello will be detected by the Nest app.
Read this Troubleshot guide on Ring Doorbell Not Ringing Inside to find a solution to your Ring doorbell not ringing.
Step 4: For wired Nest doorbell:
1. Turn off the power:
You should turn off the power to your home’s fuse box to prevent damage to your equipment by excess voltage.
2. Remove the chime cover:
Remove the cover from your doorbell chime. You need a screwdriver to uncover the chime.
Step 5: Double-check your Wi-Fi:
Google will prompt you to bring the video doorbell to your door at some point. Take the Doorbell outside and place it on the pencil mark you made. Check that the green light above the camera is still on (signifying it’s connected), and use the live feed testing screen to ensure the video footage is clear.
Step 6: For wired Nest Doorbell:
You can now follow the on-screen instructions displayed on your mobile screen. This will help you with the Nest Doorbell installation.
- Follow the on-screen wiring instructions.
- Ensure that the connector and the chime do not touch each other.
- Put the chime cover back on.
Remove Your Doorbell:
- Remove the old Doorbell and replace the wires. If you already own one.
- You need to mark holes in the door plate with a drill machine.
Installing the Wire Plates:
- Install the screws. Ensure that the Nest logo is at the bottom. Wall plates are not reversible.
- Use a bubble level to double-check the plate’s level. In case the backplate needs to be straightened, you can use the horizontal screw hole on the plate’s bottom.
Connect The Wires:
- Before connecting the wires, make sure they are clean. It does not matter which terminal is used for connecting the wires. You can also use wire extenders if you think the wires are too short.
- Mounting the doorbell.
- Mount the backplate after connecting the wires.
- Switch on the power and check if the Doorbell works properly.
Sync your Nest Hello video doorbell with your smartphone and connect your Doorbell with the help of your Wi-Fi username and password.
Step 7: Mark and drill the holes:
Make sure the metal base plate of the Doorbell is positioned correctly, and mark the two circles where the screws will go.
| Note: The Nest Doorbell comes with a wedge for adjusting the angle. Mark the screw locations with the wedge rather than the base plate if you are using a wedge. |
Use a 6mm (1/4-inch) drill bit to drill holes at each screw location. Drill starter holes in especially tough materials using the smaller drill bit.
Step 8: Attach the base plate:
An anchor is included with the doorbell screws, and you can tap it into the hole with a hammer. After, Put the screws into the holes on the base plate.
| Two Notes: First, ensure that the “G” logo is facing up on the base plate. Second, you can also level the plate on uneven surfaces by using the small, flexible buffers provided with the screws. You don’t need them, but they may come in handy. |
Step 9: Mount the Nest Doorbell:
Place the Nest Doorbell on the base plate. Cameras will be placed on the top, and doorbell buttons on the bottom. On the back of the Doorbell, you’ll see a small metal circle aligned with the circular hole at the bottom. Feel the Doorbell click into place by pushing it in and down.
Before Nest Doorbell installation, you can now set up the Doorbell using the Google Home App. The next step is to set up motion zones for better detection, to allow the camera to detect familiar faces, and to set up automated voice responses.
Conclusion:
In today’s market, Google Nest is one of the best smart video doorbells. It can be installed yourself if you purchase one. If you have existing wiring, it will be easier to install.
The Nest Doorbell installation for battery and wired doorbell is easy. You can do it yourself, or if you are not sure, hire a pro. I hope this guide on How To Install Nest Doorbell battery/wired helped you. If you need any further information or have any other concerns, please contact Nest Customer Support.
FAQs:
• Is the Google Nest Doorbell compatible with my existing doorbell chime?
Google Nest Doorbell works with a wide range of voltages and is compatible with most existing chimes.
• What is the charging time for the Google Nest Doorbell battery?
The Nest Doorbell comes 75% charged out of the box, and it takes about one hour to charge to 100%. To fully charge a drained battery, allow approximately 5 hours.
• Is there a way to widen the view?
No, the Doorbell has a 3:4 aspect ratio that lets you see people and packages clearly.
• How many doorbell cameras can I connect to a home?
You can add a maximum of 10 doorbells per home, allowing for 2mp internet bandwidth per Doorbell when considering video quality.
• Does the Doorbell come with a wedge to help install it?
Yes. A 20-degree wedge is included to angle your Doorbell for left or right adjustment and good air circulation.