

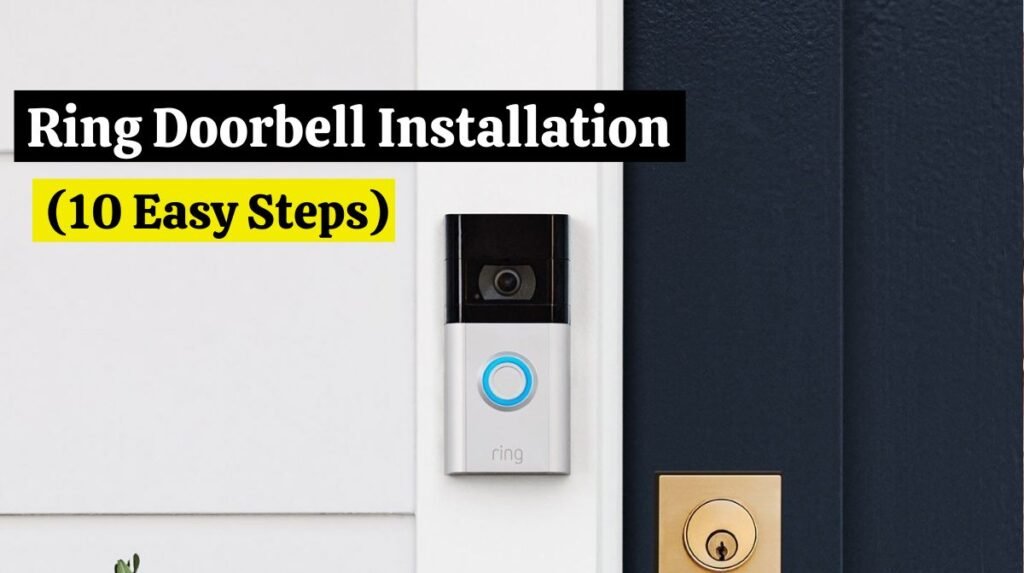
Ring Doorbell installation revolutionized home security by enabling homeowners to monitor their doorstep and enhance their safety. This comprehensive guide will walk you through the step-by-step process of How to install Ring Doorbell. Ensure optimal functionality and peace of mind with Ring Doorbell installation. This guide will show you step-by-step instructions on how to install Ring Doorbell.
What Is Ring Doorbell?

Ring Doorbell combines a doorbell with a built-in camera and intercom system for smart homes. The Ring Doorbell allows homeowners to monitor and interact with visitors remotely, enhancing home security. Ring doorbells have the following key features:
Read this guide if you are looking for information on How To Install Blink Doorbell (10 Easy Steps)
Features of Ring Doorbell:
- Video Camera: Ring Doorbells feature a wide-angle camera that records high-definition video of the area around your front door. This feature lets you see who is at your door from your smartphone or other connected device.
- Two-Way Communication: This doorbell comes with a speaker and microphone, enabling two-way communication between the user and the doorbell. With your smartphone, you can talk to visitors at your door even when you’re not there.
- Motion Detection: The Ring Doorbell features motion sensors that detect movements near your front door. You can view the live video feed and see what triggered the motion when the device detects motion.
- Cloud Storage: Ring offers cloud storage services that allow you to save and review recorded video footage. Keeping track of visitors and monitoring activity around the home can be useful.
- Smart Home Integration: Smart home devices and systems, like smart locks and lighting systems, can be integrated with Ring Doorbells. With this integration, you can create a smart home security system that is more comprehensive and connected.
- Remote Access: Users can access the Ring Doorbell remotely through a mobile App. You can view and interact with visitors from anywhere with an internet connection, adding an extra layer of convenience and security.
Ring Doorbells have gained popularity because they’re easy to install and use and provide a visual and communicative link to the front door even when the homeowner is away.
Read this Troubleshot guide on Ring Doorbell Not Ringing Inside to find a solution to your Ring doorbell not ringing.
How To Install Ring Doorbell?
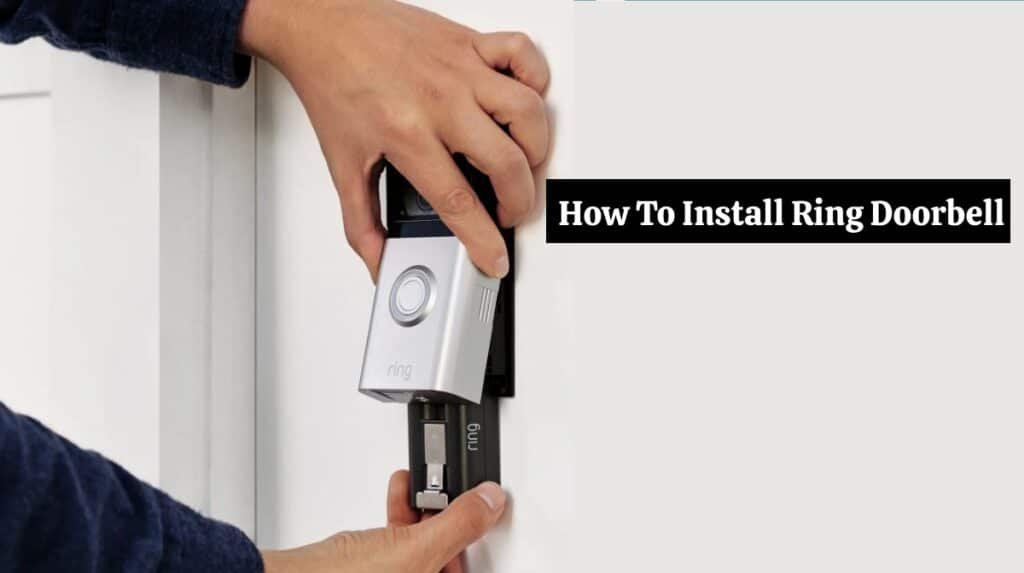
Looking for the best way to protect your home? Ring Doorbell installation is an outstanding smart home device that notifies you when visitors are at your door and deters package thieves. You can view video from your doorbell on most smartphones using the Ring App. You’ll learn everything you need to know about How to install Ring Doorbell.
Read our guide if you are looking for information on How to install a SimpliSafe Doorbell.
Unboxing your Ring Doorbell is exciting, but preparing adequately before Ring Doorbell installation is crucial. Check all components to ensure nothing is missing, and verify the doorbell’s compatibility with your door type. You can easily install your Ring Doorbell by following these simple steps.
Read our guide, Is Ring Doorbell Waterproof? It will help you determine whether your Ring doorbell is waterproof.
1. Gather The Tools You Need:
Each Ring doorbell kit contains slightly different extras, but they all come with pretty much everything you need to install your doorbell, including a screwdriver, screws, a charging cable (if required), and instructions.
For Ring Doorbell installation, you may also need a drill to screw your Ring Doorbell into brick or stucco. The Ring Video Doorbell 2 and Ring Video Doorbell Pro come with masonry drill bits for easier installation. To remove your old doorbell, we recommend that you have a box cutter or flathead screwdriver on hand.
2. Charge The Battery:
In the case of Ring Video Doorbell Pro, you can skip this step.
When you have unboxed your Ring, locate the battery and plug it into power with the included charging cable. Ring 2 batteries can be tricky to remove since they’re designed for easy pop-out after the doorbell has already been mounted.
Hold it against a vertical surface (such as a wall) to remove it. A wall pushes the battery out, and gravity helps it drop into your hands.
The battery should show a green light and a red light when it is charging. It may take four to six hours to charge. The red light will go off when the battery is fully charged.
3. Connect To The Wi-Fi:
To connect the Ring Video Doorbell to your Wi-Fi network, download the Ring App and follow the instructions. Following the instructions in the app takes about 10 minutes.
The doorbell’s Wi-Fi connection should be set up close to its final installation location, even if you connect it before Ring Doorbell installation. You can place a plug-in Wi-Fi extender between your router and front door to boost the signal.
4. Turn off The Power:
Turn off your doorbell’s power at your home’s breaker box (usually found in your garage, basement, or at the rear of your home). You will be working with exposed wiring, so this is for your safety.
You don’t need to worry about wiring if you don’t have an existing doorbell. Battery-powered Ring Doorbell installation did not require hardwiring.
5. Remove The Old Doorbell:
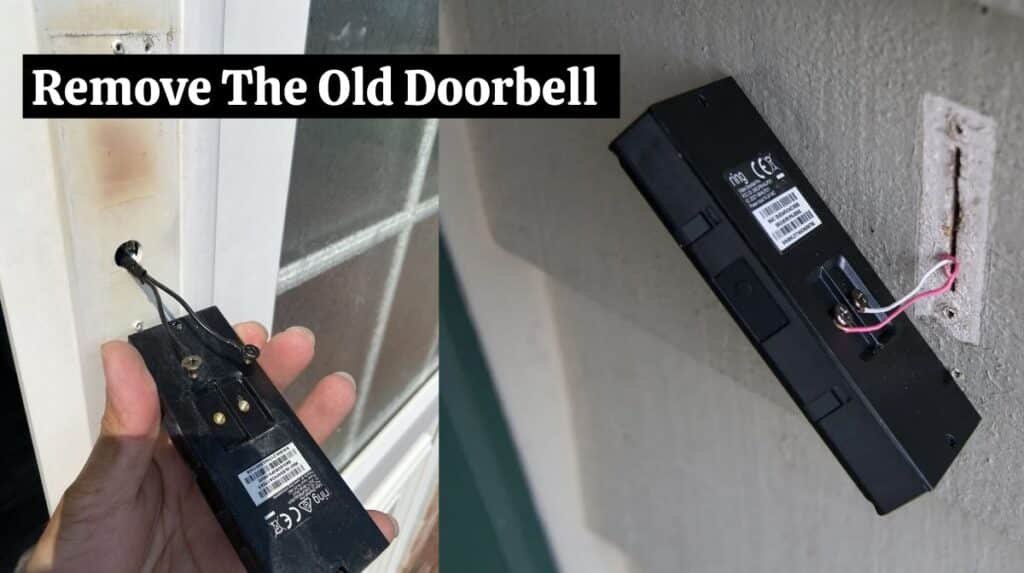
Before the new Ring Doorbell installation, remove the old doorbell’s faceplate with a screwdriver or boxcutter. Remove the old doorbell by unscrewing it and pulling it out gently.
Wires should still be wound around screws inside the old doorbell, so be careful not to damage them by pulling too hard. Remove the old doorbell completely by loosening the screws and detaching the wires.
Read this guide if you are looking for information on Reset SimpliSafe Doorbell (6 Easy Steps).
6. Attach The Mounting Bracket:

You should now have a hole in your wall where you used to have a doorbell and two doorbell wires hanging out. You can watch the doorbell’s live feed before attaching the mounting bracket.
• Check the angle on your phone after you place your Ring Doorbell over the hole where you’re going to mount it. Using an angled mounting bracket, you can tilt the camera up, down, left, or right if you are unsure about the right angle.
• When you choose the mounting location, mark the bracket holes with a pencil and level. After marking them, remove the level.
• Attach the angled mount to the wall first by screwing it in, then attach the mounting bracket to it. If your old doorbell is still in place, hang the bracket directly over the opening so the wiring runs through it.
| Note on brick and stucco: For brick or stucco Ring Doorbell installations, you’ll need to drill holes for the white plastic anchors needed to hold screws in place using the included masonry bit. Drill the holes in the locations you marked, insert the anchors, position the mounting bracket on top, and screw in the mounting bracket screws. |
Don’t worry about using anchors if you have wood or vinyl siding.
7. Attach Doorbell Wires (Optional):
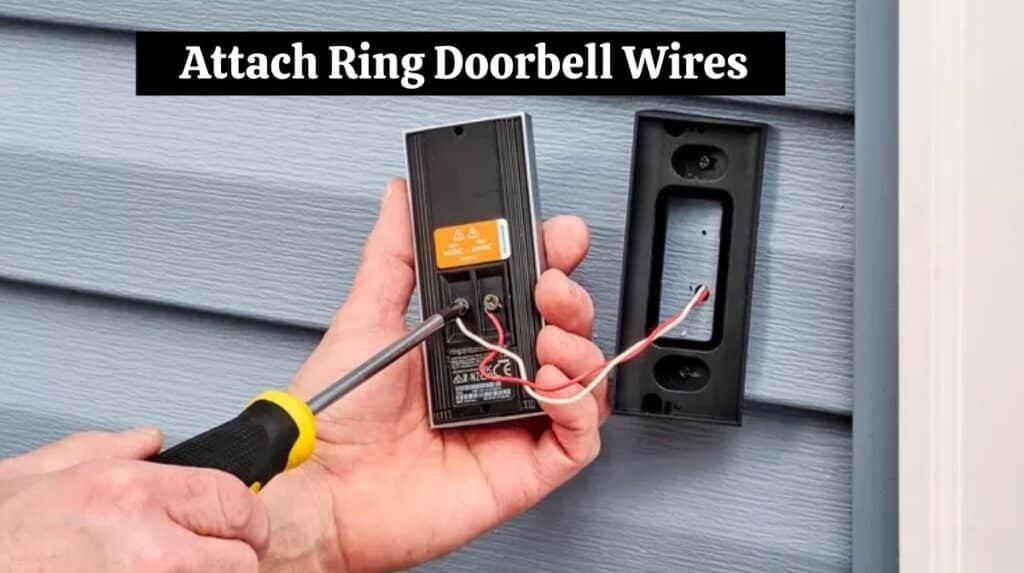
The Ring can now be connected to your current doorbell chime to prolong its battery life. It can also make your chime ring when visitors press the doorbell button.
You can skip this step if you don’t already have a doorbell. A Ring Chime is the best way to experience a traditional doorbell. You can also use phone notifications to notify you of visitors.
Firstly, loosen the two screws on the mounting bracket located over the hole where the wiring is sticking out. Make sure each screw is not touching one another by wrapping a wire around it. Ensure that each screw has a good connection. If necessary, tighten the screws gently. Congratulations! The circuit is now closed.
| Note on digital chimes: If you own a digital doorbell chime (one that produces more electronic two-toned sound than the traditional “ding dong”), now is the perfect time to attach the diode. If you need more information on this step, check your installation instructions. |
8. Mount The Ring Doorbell:
Finally, we’ve reached the exciting part. Put your Ring Video Doorbell on the bracket and press in until it clicks into place. This step can be done with a little bit of force.
9. Restore The Power:
After Ring Doorbell installation, switch on your device again by flipping the breaker switch. Make sure everything works by testing it out. Remove the faceplate and double-check that your connections are secure if your Ring Video Doorbell isn’t chiming. The diode on your digital chime may also need to be reversed.
Using the small end of the included screwdriver, screw the two included security screws into the underside of the faceplate if everything appears to be in order.
10. After Ring Doorbell Installation, Customize The App:
The Ring Doorbell installation has been completed. Now, you can adjust settings on your Ring app, set motion detection and night vision, select what kind of alerts you want, and pick what areas you want the camera to cover. Remember to choose a Ring storage plan to save your clips.
How to Set Ring Doorbell Motion Zones:
Before Ring Doorbell installation, you need to set the motion zones. To set the Ring Dorrbellmotion zones, follow these simple steps.
- Tap the three lines in the upper left corner of the Ring App home screen.
- Tap on Devices.
- Tap your ring device at the top, for example, the Front Door.
- Tap on Motion Settings.
- Tap Edit Zones.
Creating up to three motion zones that prevent false notifications, such as passing traffic or neighbors checking their mail, is possible. At the bottom of the screen, tap Add Zone and drag the colored sliders until an area is highlighted. A Ring notification will be sent if movement is detected in that area. Outside the area, movement is ignored.
How to Check Ring Doorbell Device’s Health:
Before Ring Doorbell installation, Not getting Ring notifications? If your device is offline, you can do some things. There may also be other issues; you can check your device’s health.
- Tap the three lines in the upper left corner of the Ring App home screen.
- Tap on Devices.
- Tap your ring device at the top, for example, the Front Door.
- Tap Device Health.
It displays details about your doorbell, including Wi-Fi signal strength, firmware status, MAC addresses, and even transformer voltage.
Conclusion:
Congratulations! Your Ring Doorbell installation is completed, allowing you to secure your home in a new way. With enhanced surveillance and smart connectivity, you can enjoy peace of mind. You can use this guide on “How to install Ring Doorbell” to unlock the full potential of your Ring Doorbell – a device that seamlessly blends convenience and security.
Ring Doorbell installation adds a simple yet effective feature to your smart home. You can enjoy a safer smart home experience by installing this device. There are many options for personalizing the doorbell, and it is easy to customize. If you face an issue or need further information, Contact Ring Customer Support.
FAQs:
• How much does it cost to install my Ring Doorbell?
Professional installation of a Ring Doorbell will cost you between $100 and $250.
• Does a wired Ring Doorbell need a chime?
Ring Doorbells do not require the Ring Chime, but it enhances the overall experience. Your video doorbell notifies you when motion or ringing is detected.
• What doorbell transformers are compatible with the Ring Doorbell?
Video Doorbells work with doorbell systems operating at 10-24 volts AC, 50 or 60 Hz, with a maximum power of 20-40 watts.
• How does Ring Doorbell work with multiple users?
By inviting Shared Users, you can add them to your account. The user must have a Ring account with a personal email address and password. The account owner invites each Shared User individually to each device.
• Do you need an electrician for Ring Doorbell installation?
If you need more confidence working with electrical wiring, have an electrician install it.
• Is the Ring Doorbell wired hard to install?
No, it is not difficult to install the Ring Doorbell. If you follow the steps above and observe safety precautions, you can install a Ring video doorbell on your own.
• Can the Ring Doorbell be used without a base station?
Yes, the Ring Doorbell can be used without a base station. The Ring Doorbells, including the Ring Doorbell Pro and the cameras, all work independently of the base station.
• Does the Ring Video Doorbell wire work with my existing doorbell system?
It’s important to check compatibility since you’ll be using your existing doorbell wire. Ring your existing doorbell and listen for the chime to see if it is compatible with Ring Doorbell. If it rings, your doorbell system works.