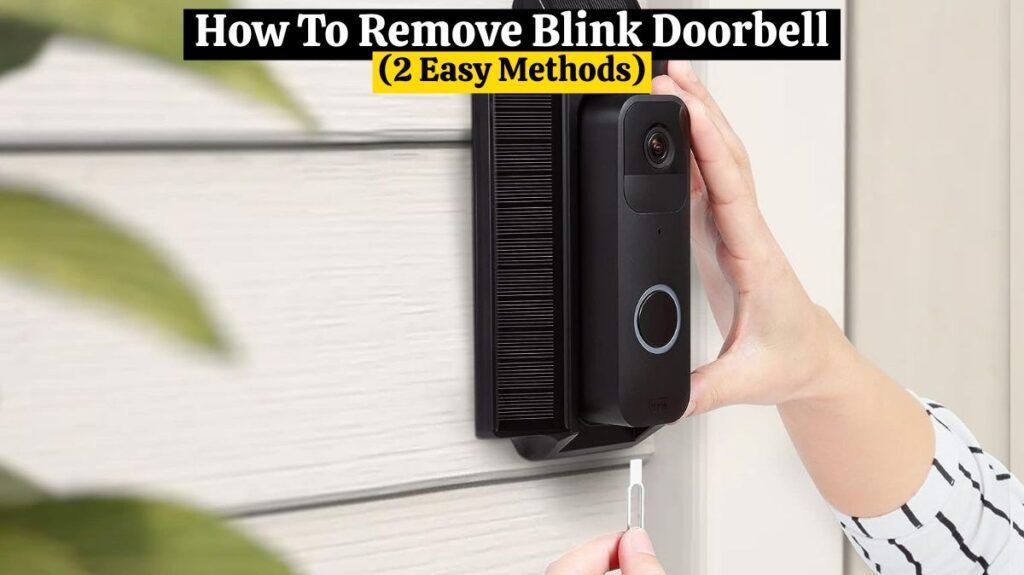
How To Remove Blink Doorbell (2 Easy Methods)
Are you planning to upgrade your home’s front door with the latest doorbell? Here is something you might find interesting: the Blink Doorbell. This intelligent surveillance device will help keep your home secure and safe from unwanted visitors.
It may become necessary for you to remove the Blink doorbell at some point. You may be moving out, need new batteries, want to upgrade to a newer model, or require a reset of your Blink doorbell. For a variety of reasons, it is important to know how to remove the Blink doorbell. Are you now wondering how to remove Blink doorbell without a tool and with a tool?
There is a plastic clip on the back of Blink Doorbells that secures the plastic mounting bracket to the wall. It is easy to remove Blink doorbell with the Blink removal tool. In the absence of the included removal tools, you can open the clip with any hard, thin, and flat tool. It might be helpful if you use a key or a small screwdriver.
In this blog post, we will explain how to remove the Blink doorbell safely and correctly if need be. So keep reading to learn more about how to remove the Blink doorbell.
Reasons to Remove Blink Doorbell
You might need to remove the Blink Doorbell for several reasons.
When you move to a new home, your device may be taken with you to your new residence, or you may need to remove it to prevent your personal data from being accessed by the new homeowner.
In some cases, the device may malfunction or stop working, and you may need to send it for repair or troubleshooting. It may also be a good idea to remove Blink Doorbell if you no longer require its services or have upgraded to a new one.
Also Read This: How to Remove Nest Doorbell (3 Easy Steps)
How to remove Blink Doorbell safely:
To protect yourself and the Blink Doorbell, it is important to take some precautions before removing your Blink doorbell. Following are some precautions to take:
Turn off the Power:
If you have a wired Blink doorbell, make sure you turn off the device’s power supply before removing the doorbell. In this way, any electrical shock or device damage can be prevented.
Wear protective Gloves:
Protect your hands from the device’s sharp edges or small parts by wearing protective gloves.
Read This: Blink Doorbell Blinking Red ( Causes and 6 Easy Fixes)
Disconnect the wires:
Make sure the doorbell’s wires are disconnected carefully. It is important to note which wires are connected to which terminals so you can reconnect them correctly in the future.
Store in a safe place:
Store the Blink doorbell and its components in a safe and dry place. Do not expose it to moisture, extreme temperature changes, or other hazards that could damage it.
Read This: Blink Doorbell Not Detecting Motion (Causes & 12 Easy Fixes)
How to Remove Blink Doorbell With Tool:
This article describes how to remove theBlink doorbell and its back cover and install batteries for the Blink Video Doorbell. You can follow these simple steps to remove the Blink doorbell with the help of the Blink doorbell release key.
CAUTION`
Electrical Shock Hazard: When electric wires are connected to the Blink doorbell back plate, the live current is available at the two metal contact posts. Before opening the Blink doorbell back cover, turn off all power to the doorbell chime at the circuit breaker.
Also Read This: Ring Doorbell Not Ringing Inside: Try These 9 Steps Before Replacing
| Note: If you remove the Blink doorbell for a battery replacement, it is important to note that Blink doorbells and cameras are only compatible with size AA 1.5 volt Lithium non-rechargeable batteries. |
Use the Release key:
A release key that came taped to the paper template in the product box can be used to remove Blink doorbell from its mounting plate.
If you need another release key, contact Blink support.
Disconnect The Blink Doorbell from the mounting plate:
To disconnect the doorbell from its mounting plate, simply press the key straight in the slot on the bottom, and the grey catch will release. By doing this, you will be able to remove the Blink doorbell from the mounting plate.
Read This: Is Ring Doorbell Waterproof? How To Protect Them
How to access the battery compartment:
Remove the battery cover:
If you want to access the batteries on the doorbell, remove the weather-resistant back cover after disconnecting it from its mounting plate.
Open the battery cover:
Flip the Blink doorbell over so you’re looking at the back. You will need to lift the grey latch at the bottom of the doorbell with your fingernail. This releases the Blink doorbell weather-resistant cover, allowing you to remove and replace the Blink doorbell batteries.
Note: Keep the Blink doorbell battery cover in a safe place when you change batteries.
How to close the battery cover
- The tabs at the top of the door should be inserted into the slots near the terminal screws.
- Push the bottom of the Blink doorbell back cover until you see and hear the grey latch click into place.
Read This: Eufy Doorbell Installation (6 Easy Steps)
Re-mounting the Blink Doorbell:
Set the hook by aligning the top of the doorbell with the top of the backplate. The next step is to firmly press the bottom against the back plate until you hear a click.
After re-mounting your Blink doorbell, press the doorbell button to test it.
How to Remove Blink Doorbell Without Tool:
| Note: To remove Blink Doorbell, make sure that the power is turned off by switching off the circuit breaker or unplugging the transformer. |
To remove your Blink doorbell from its mounting bracket, use a small flathead screwdriver or the paper clip-looking tool that came with your Blink doorbell. You can use a screwdriver if you don’t have the release tool that came with the doorbell.
To disassemble and remove the Blink Doorbell from the mounting bracket, you will first need to find the right slot. At the bottom of the Blink doorbell, you will see four different slots.
Those three are situated in the middle of the bottom surface. These are the speakers and microphone on the doorbell. You should avoid inserting any tools into there, as this will most likely damage the two-way talk speakers irreparably.
The fourth slot will be located next to the wall mount and will be slightly larger than the others. You should concentrate on this one.
Read This: How To Reset Ring Doorbell – Easy Steps For All Models
This slot leads to a plastic clip that attaches the Blink Doorbell to the bracket on the wall. You can disengage the clip by following these steps:
- Remove any debris from the slot with a pointed object, such as a needle. Be careful not to force the clip, as this could permanently damage it.
- You can insert any of the tools mentioned above or anything that fits and seems rigid enough.
- You should gently pull the tool toward you. It shouldn’t require much force at all. Using a flashlight, check if anything is blocking the clip if it feels like it is not moving despite clearing it of debris.
- Disengage the clip while holding the Blink Doorbell in the other hand. It will fall straight to the ground, possibly damaging the camera or other components inside.
You can change the batteries or reset the Blink doorbell once it has been removed from its bracket. You can see the ledge on the doorbell that holds it in place, and the clip on the bottom secures it in place.
You may or may not need a separate battery compartment case, depending on the mounting bracket you use for your Blink Doorbell. In some cases, Blink Doorbells have a weather seal between themselves and the mounting bracket.
As you proceed, keep your setup in mind as you check the specifications of your mounting bracket. To avoid damage, you’ll also need to watch your wires if your doorbell is wired to a chime box.
Be careful not to touch any exposed wires. There are ten amps of power at 16 to 24 volts, and touching a live wire could result in serious injury. Also, don’t hang your doorbell from these wires, as this may damage the pins. You should wear protective gloves while working or shut the circuit off from your fuse box before starting.
Conclusion:
Using the paperclip-type tool included with your Blink Doorbell, you can easily open and remove Blink doorbell. It is common to lose a small tool, especially once it has been in use for a long time.
Any rigid tool will do the trick if it fits into the slot. The wrong slot may damage the speakers, so make sure you insert the tool into the correct one.
Be sure to clear out any debris that has accumulated in the slot before you try to open your Blink Doorbell. Avoid any accidents by wearing protective gloves or cutting power to the circuit if your Blink Doorbell is connected to a chime.
FAQs:
- What is the range of the Blink doorbell?
The doorbell Camera motion sensor is shaped like a cone of about 100 degrees in width, tilted downward 10 degrees, with a range of 25 feet (7.6 meters). At 17 feet (5 meters) away, the doorbell detects movement from knee level when it is mounted about 45 inches (114 cm) above the ground.
- What chimes work with a Blink doorbell?
When you do not have existing doorbell wiring or if you want a more modern chime, the Ohmkat wireless chime works very well with Blink doorbell.
- How long does Blink doorbell battery last?
With default settings and normal use, a Video Doorbell can last for up to two years when paired with a Sync Module. When your battery is low, you will be notified. In the Blink app’s home screen and on the doorbell’s settings screen, a battery level indicator is displayed.